

Answering Three Common Questions About Car Air Filters

An engine needs to be fed a steady supply of clean air for the internal combustion process to work its magic. This air enters the vehicle through an air intake, typically located behind the grille, and passes through the air filter before eventually entering the engine. The air filter is responsible for scrubbing dust, debris, pollen, and pollution from the air before it can travel into your engine, which, despite being able to contain countless small explosions every second it’s in operation, is actually pretty sensitive to foreign objects.
Regular air filter replacement is an important part of any vehicle maintenance schedule and should never fall by the wayside. Failing to replace an air filter that’s past its prime can result in any number of performance-related issues, from poor fuel economy and acceleration to black, smelly exhaust and even misfires. A new engine air filter can typically be sourced for between $20 to $50, which isn’t that much of an investment when you consider how much of an impact it can have on your vehicle’s performance and fuel efficiency. How do drivers know when they need a car air filter replacement near Mason? We’ll address that question, outline the typical air filter replacement schedule, and walk you through the process in this quick guide to car air filters.
How Often Do You Need to Replace an Air Filter?
Like many routine maintenance tasks, the frequency with which you should replace your engine air filter all comes down to how your vehicle is used. If you’re the type of driver who doesn’t put their car, truck, or SUV through much heavy-duty use, you can probably get away with replacing your air filter every 30,000 miles or two years. If, on the other hand, you regularly find yourself traveling in dusty off-road conditions, live in an area with higher-than-average pollution, or are frequently caught in post-game traffic jams on the way home from the Great American Ball Park, you might consider accelerating your air filter replacement schedule to around every 15,000 miles or 12 months.
These timelines are specific to disposable air filters, but the story is a little different when it comes to the reusable variety. Typically made of gauze or foam, reusable air filters can last as long as 100,000 miles. While this might be an alluring prospect for those looking to save money on regular replacements, it’s important to read the fine print. Most oiled reusable air filters must be removed and rinsed with water every 5,000 miles. Synthetic dry air filters might be able to go as long as 10,000 miles between cleanings but require a specific cleaning solution to remove dirt, grime, and pollution effectively.
How Do You Know When It’s Time for a Replacement?
There are several telltale signs that may indicate your air filter has gone past its prime.
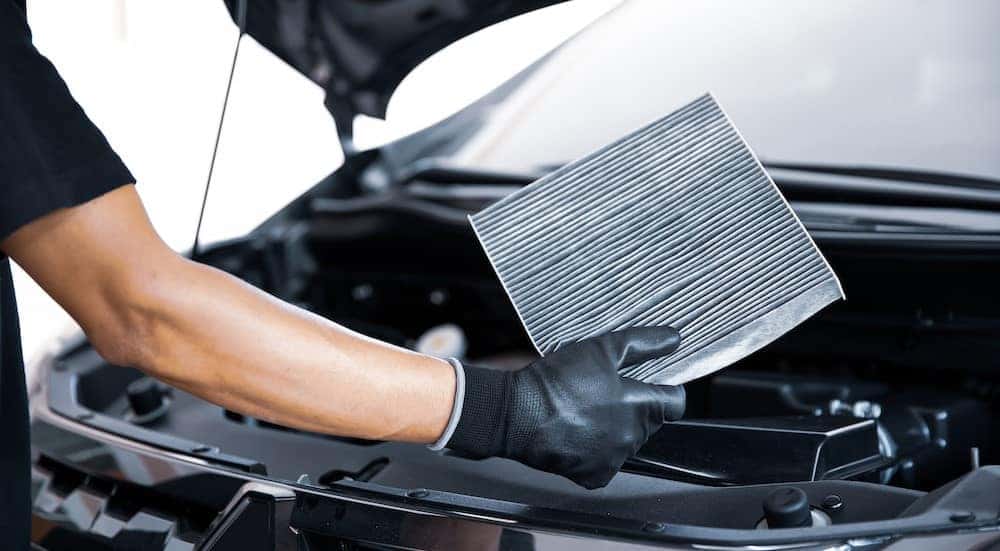
Dirty Air Filter: A quick visual inspection is often one of the quickest ways to diagnose a clogged air filter. A filter that’s in need of replacement will usually be pretty obvious, but if you’re not sure, there’s a simple test you can perform. Just grab a flashlight and shine it through the air filter. If no light makes its way through the filter, you probably need a replacement or at least a thorough cleaning.
Poor Fuel Economy: If you’re not logging the same MPG you once did on your way back and forth to Findlay Market, the air filter should be one of the first things you check. A vehicle needs a precise mixture of air and fuel to offer the best possible fuel economy, but this ratio can get thrown all out of whack when the air filter is clogged, as it causes the engine to dump in more fuel to make up for the lack of air.
Poor or Jerky Acceleration: Besides impacting fuel economy, a dirty air filter can noticeably affect performance. If stepping on the gas pedal doesn’t result in the same acceleration you’ve become accustomed to, it might be worth popping the hood and checking in on your air filter. A clogged air filter can also cause a vehicle to jerk and buck when accelerating or even stall when decelerating.
Poor Starts or Misfires: If a dirty air filter isn’t promptly addressed, it can lead to some surprisingly severe symptoms. A vehicle that fails to start or experiences a rough idle can be the result of a lack of air entering the engine. This lack of air will lead to excess fuel, which can accumulate on the spark plugs and cause a distressing misfire.
Engine Noise: The air-related misfire we mentioned above is often accompanied by a sputtering or popping sound from the engine when idling. If your vehicle has reached this point, simply replacing the air filter might not solve the problem, as a whole new set of spark plugs might be necessary.
Black, Smelly Exhaust: Unburned fuel from a poor fuel-air mixture can eventually make its way out of the tailpipe. This will often result in the smell of raw fuel and might be paired with black exhaust smoke. In some cases, this fuel-rich exhaust can even ignite, resulting in a small backfire that can cause your tailpipe to emit flames.
Check Engine Light: When all else fails, there’s the check engine light. If this light pops on and you’ve noticed any of the signs and symptoms listed above, the air filter could be to blame. Using an OBD-II reader can help you narrow down the issue using a diagnostic trouble code (DTC), though simply checking the air filter is usually an easier option.
How Do You Replace an Air Filter?
The specific answer to this question depends on your particular make and model, but the general procedure is the same for all vehicles.
- Start by gathering the supplies you’ll need for the job. Different vehicles use different types of fasteners to keep the air filter housing securely closed. Depending on your specific make and model, you might need a flat-head or Phillips screwdriver, wrench, or socket wrench. Some air filter housings are secured using metal or plastic tabs, so your fingers might be the only tools you’ll need. You’ll also want to throw on a pair of safety glasses. If the vehicle has recently been used, let the engine cool off before starting the project.
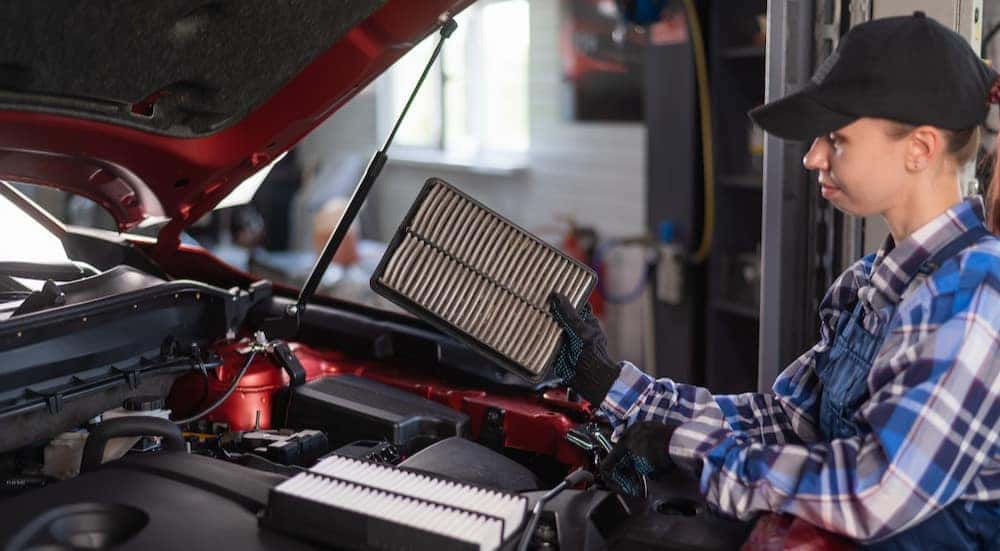
- The next step is locating the engine air filter housing. On most modern vehicles, the air filter housing will come in the form of a black rectangular box on the engine compartment’s left or right side. This box is typically found towards the front of the compartment and will be attached to an air intake hose that connects it to the engine. On some older vehicles outfitted with a carburetor, the rectangular air filter housing box will be replaced by a round metal or plastic cover, often on top of the engine. As always, consult your owner’s manual if you’re having trouble identifying any components.
- Once you’ve found the air filter housing, identify what fasteners are being used and grab the appropriate tool. If the housing is secured with plastic tabs, do not use too much force when loosening them, as this can easily lead to breakage.
- After the cover is off, reach in and remove the old air filter. This shouldn’t require any special tools, but note how it’s placed in the air filter housing, including which side is pointed up.
- Replacing your engine air filter provides a good excuse to give the housing a once-over. When the filter has been removed, take a moment to clean out any dirt, leaves, twigs, or other contaminants that might have worked their way into the housing. If you’re feeling ambitious, break out the vacuum cleaner and hit the air filter housing with a little suction before moving on.
- Now it’s time to install your new air filter. This shouldn’t be too tricky as air filters are typically designed so that they can’t be incorrectly installed, but when in doubt, you can always refer to the owner’s manual. Ensure the filter is securely fixed in place, and give it a quick check to ensure there isn’t any bunching or folding around the edge that could prevent a tight seal.
- With the new air filter installed, it’s time to reinstall the housing. Again, make sure not to use too much force when reinstalling the screws or bolts or reattaching the tabs, as the plastic housing can be easily broken. This could compromise the air filter’s seal and even require the replacement of the housing itself.
- At this point, there’s nothing left to do but test the new air filter. Start the engine with the hood open and listen for whistling, wheezing, or other noises that might indicate a bad fit or seal. If the installation has been botched, the vehicle might trigger a check engine light.
Whether you’re spending the day taking in a match at the Lindner Family Tennis Center or checking in on the critters at the Cincinnati Zoo and Botanical Garden, a clean air filter will provide your engine with all the fresh air it needs to keep you chugging right along. While some automotive tasks should be left to the professionals, an air filter replacement should be well within the comfort zone of most DIY mechanics. This relatively simple maintenance project requires no specialized equipment, is relatively safe, and should only take around 10 minutes. If you have your doubts or simply don’t feel comfortable working under the hood, you can always stop by McCluskey Chevrolet and let one of our experienced service technicians take a look. In addition to enjoying top-tier service, drivers can rest easy knowing that the proper filter for their specific make and model has been installed.

0 comment(s) so far on Answering Three Common Questions About Car Air Filters